Flooring installation punch list
A flooring punch list is the list of fixes left after a floor goes in: seams, edges, transitions, doors, trim and clean-up. Flooring punch lists are walked on hands and knees as much as on foot. Check the edges, the transitions and how the floor feels underfoot. Then look across the floor in low light to catch what you can't see standing up. The JobsiteHQ flooring installation punch list below has 17 checks in 6 areas, ready to print.
Hardwood and laminate
- No squeaks or soft spots when walked.
- Expansion gaps covered at walls and fixed objects.
- Boards tight with no gaps at the ends or along the run.
- Even finish with no swirl marks, dust nibs or missed areas on site-finished floors.
Tile and stone
- No raised edges between tiles; grout full and even, haze removed.
- No hollow-sounding tiles when tapped.
- Movement joints at the perimeter and where the floor meets walls.
Carpet
- Seams invisible from normal standing angles.
- Stretched tight with no ripples; tack strip not felt underfoot.
- Clean cuts at doorways and transitions.
Vinyl plank
- Planks locked together, no peaking or gaps at the ends.
- Cut edges hidden under trim.
Transitions, doors and trim
- Transitions secure and level, no trip edges between rooms.
- Doors swing clear - cut down where the new floor is thicker.
- Baseboard and shoe molding back on, nail holes filled.
Clean-up
- Floor cleaned with a product suited to the finish.
- Leftover material labeled with the room and product and left for the client.
How do you use this checklist?
Print the 17-check flooring installation punch list from JobsiteHQ, or keep the page open on your phone, and walk the job in the order of the sections. Tick each line once you've checked the work. Anything that needs work goes on your own list, with the room and what's wrong. Hand your list to the trade who fixes the items, then walk the fixed items again.
How do you run the final walkthrough?
Walk the new floor in socks, check the edges and transitions on your knees, then look across the floor in low light. The 6 areas of the JobsiteHQ checklist above follow the same route.
- Walk the floor in socks. Squeaks, high seams and loose planks show up underfoot first.
- Tap tile with a coin or a screwdriver handle. A hollow sound means the tile isn't fully bonded and may crack later.
- Swing every door. A new floor raises the height enough to make one drag.
What gets missed on a flooring installation?
On a flooring installation, the misses are mostly the spots nobody looks at on the way out. The 6 items below are the ones that come back as a call after the final invoice.
- Door gaps
- A thicker floor can leave a bathroom door with no gap for air; a bath fan needs an undercut of about 1/2 inch. Check every door swings and closes.
- Appliances
- The fridge, washer and dishwasher get moved for the install. Check all 3 are back, level and the water lines are dry.
- Floor vents
- Registers come up for the install. Check each one is back, cut in cleanly and sitting flat.
- Stair nosings
- Stair nosings are the hardest flooring pieces to fit. Check each nosing is tight and doesn't move underfoot.
- Room to move
- Wood and laminate grow and shrink with the seasons. The expansion gap at the walls - often 1/4 inch or more, per the maker - must stay covered either way.
- Thresholds at exterior doors
- Where the floor meets an exterior door, the threshold has to seal. Check the 2 ends for gaps you can see light through.
How do you close out the punch list?
Closing out a flooring installation punch list means finishing every open item, showing the client the finished work, and handing over what the client needs to look after the work. The 3 steps below come before the final invoice.
- Give the client the cleaning instructions for the floor's finish.
- Leave a labeled box from the same batch for repairs.
- Note any subfloor problem you found, with the room and the spot.
Skip the clipboard
Walk the flooring installation with JobsiteHQ open and say what you see, room by room. JobsiteHQ writes the punch list, sorted by area, for you to check over, then turns the list into a client summary, an estimate and an invoice. JobsiteHQ works with no signal.
Try it free for 14 days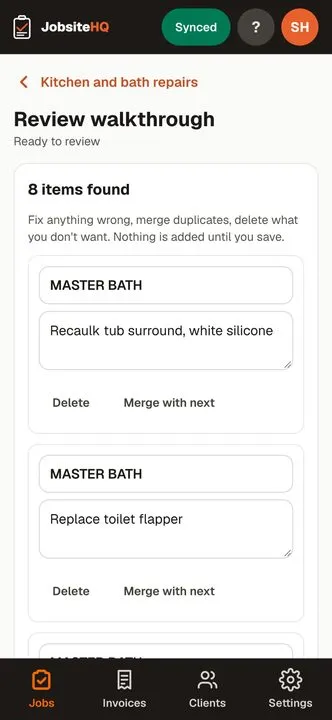
Questions
- How much unevenness between tiles is acceptable?
- Acceptable lippage depends on the tile size, the grout joint and the standard you work to, such as ANSI A108. As a rule of thumb, if a fingernail catches the tile edge or low light shows a shadow, the client will notice the lippage too.
- Should leftover flooring be left behind?
- Leftover flooring should usually be left with the client. 1 unopened box from the same batch is what makes a future repair blend in. Label the box with the room and the product.
- When can furniture go back on a new floor?
- Furniture can go back on a new floor when the product's instructions say so. Site-finished wood and glued floors need longer than click-together floors.
- Should the client be on the walkthrough?
- The client should be on the flooring walkthrough. Walk the floor together in good light, and record the walk in JobsiteHQ. Agree on anything that's a defect, and anything that's normal for the material.
- What if the subfloor was the problem?
- Write a subfloor problem down in JobsiteHQ with the room and the spot. A dip or squeak from the subfloor may need a different fix, and a different price.