Home inspection repair punch list
A home inspection repair punch list is the list of repairs agreed after a buyer's home inspection, written so each one can be priced, done and proven before closing. The repair request usually arrives as a report full of findings. A punch list makes the agreed repairs easy to price, finish and prove. Group the punch list by area, in plain words, with what fixed looks like. The JobsiteHQ home inspection repair punch list below has 18 checks in 5 areas, ready to print.
Electrical
- GFCI protection added where the report calls for it.
- Open junction boxes covered; missing cover plates installed.
- Reversed polarity and open grounds corrected.
- Smoke and carbon monoxide alarms installed and tested.
Plumbing
- Drips at faucets, traps and supply lines fixed.
- Slow drains cleared.
- Water heater relief valve discharge pipe installed.
- Loose toilets secured; running toilets repaired.
Exterior
- Downspouts extended away from the foundation.
- Grading corrected where water sits against the house.
- Rot repaired at trim, sills and door jambs.
- Caulking at windows, doors and penetrations.
Interior
- Doors adjusted to latch; missing stops and hardware installed.
- Windows repaired to open, close and lock.
- Loose handrails secured.
Safety
- Dryer vent cleaned and properly connected.
- Garage door opener reverses on an obstruction.
- Door from the garage to the house closes and latches where required.
How do you use this checklist?
Print the 18-check home inspection repair punch list from JobsiteHQ, or keep the page open on your phone, and walk the job in the order of the sections. Tick each line once you've checked the work. Anything that needs work goes on your own list, with the room and what's wrong. Hand your list to the trade who fixes the items, then walk the fixed items again.
How do you run the final walkthrough?
Walk the house with the inspection report in hand, confirm each repair item on site, and write each item in plain words against the area of the house. The 5 areas of the JobsiteHQ checklist above follow the same route.
- Keep the inspector's wording and item number next to yours - '4.2 Electrical'. Agents and buyers compare the repair list with the report line by line.
- Photograph every inspection repair once the repair is done. 2 photos per item, before and after, are what get the list signed off without a second visit.
- List items outside your trade separately - a roof, an HVAC system - so the agent knows which repairs need another licensed contractor.
- Read the inspector's photos as well as the text. The inspector's photos often show exactly which outlet, pipe or board a finding means, even when the text just says 'Bedroom 2'.
What gets missed on a home inspection repair job?
On a home inspection repair job, the misses are mostly the spots nobody looks at on the way out. The 5 items below are the ones that come back as a call after the final invoice.
- Findings outside the summary
- Some findings are only in the body of the report. Read the whole report against the repair request.
- Exact location
- 'Missing GFCI' doesn't say which outlet. Write the room and wall, so the re-inspection finds the right outlet.
- Permits
- Some inspection repairs need a permit or a licensed trade where you are; in many US states, electrical and gas work do. Flag permit and licensed-trade repairs before you price the list.
- Re-inspection access
- The buyer's inspector may come back. Leave panels open and areas clear until the inspector has signed off.
- Extra items
- Buyers sometimes add items at the walkthrough. Keep the agreed repair list separate and price extra items separately.
How do you close out the punch list?
Closing out a home inspection repair punch list means finishing every open item, showing the client the finished work, and handing over what the client needs to look after the work. The 3 steps below come before the final invoice.
- Send a short summary: each item, what was done, and a photo.
- Attach receipts for parts and any licensed work.
- Send the repair summary to whoever asked for the repairs, usually an agent, before the buyer's final walkthrough - often within 24 hours of closing.
Skip the clipboard
Walk the home inspection repair job with JobsiteHQ open and say what you see, room by room. JobsiteHQ writes the punch list, sorted by area, for you to check over, then turns the list into a client summary, an estimate and an invoice. JobsiteHQ works with no signal.
Try it free for 14 days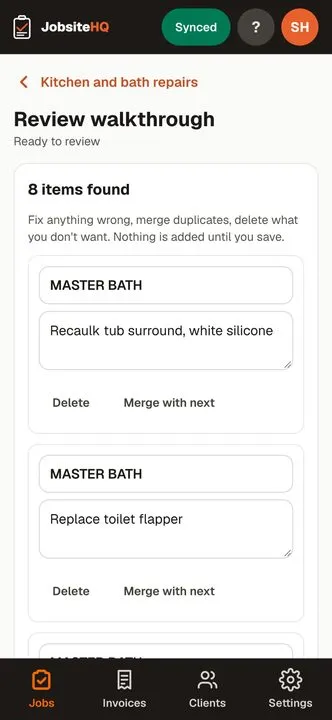
Questions
- How do I turn an inspection report into a punch list?
- Turn an inspection report into a punch list by pulling out each finding that's being repaired and writing the finding against an area in plain words, with what done looks like. Then walk the house to confirm each item and the item's location, recording the walk in JobsiteHQ, before you price the list.
- Do buyers ask for receipts for inspection repairs?
- Buyers often ask for receipts for inspection repairs. Keep receipts and photos with the job in JobsiteHQ, so you can send both with the final invoice.
- Who pays for inspection repairs?
- Whoever the sale agreement says, usually through a repair addendum. Your own contract is with whoever hired you.
- How do you price inspection repairs?
- Price inspection repairs item by item, using the report's numbering - 'item 3.4, $85'. Buyers and agents compare line by line, so one price per item is easier to approve.
- What if a repair turns out bigger than the report said?
- Stop when a repair turns out bigger than the report said, and write down what you found, with photos. Send the findings to whoever hired you before doing more than was agreed.
- Should I re-check items the report marked as 'monitor'?
- Re-check 'monitor' items only when the agreed repair list names the item. Note anything you see, but don't take on work nobody has asked or paid for.